SELLER'S RESOURCE »

Selling your home is an exciting event. Casting your home in a favorable light can really help to bring in a large volume of potential buyers-a picture is worth a thousand words. Sometimes what homeowners believe makes their home look its best is not always conducive to yielding the best photos to showcase their home. At TK homes, we have photographed an extensive number of homes all over the Denver metro area and central Colorado, and we even provide real estate photography services for other real estate agents.
Professional quality photos are essential for a successful listing. Why? Well-done photos showcase the unique qualities of a home. One of the benefits of using a professional photographer is they use a wide-angle lens to give a good sense of the size of rooms. It is difficult to reproduce what we actually see with the human eye due to the fact that our field of view is so much bigger than that of any camera lens. The second big benefit of using a professional photographer is the use of High Dynamic Range (HDR). This is a process where multiple exposures are taken of the same shot so the image represents more accurately what we might see in person. The last major benefit of using a professional photographer is that they edit all images of your home. Camera technology today is quite amazing, but it can still be difficult to get shots that adequately do a property justice. When images are reviewed with a fine-tuned eye, they can often be tweaked to bring out the absolute best representation of your home.
So, what can YOU do to make your home look its best in your listing photographs?
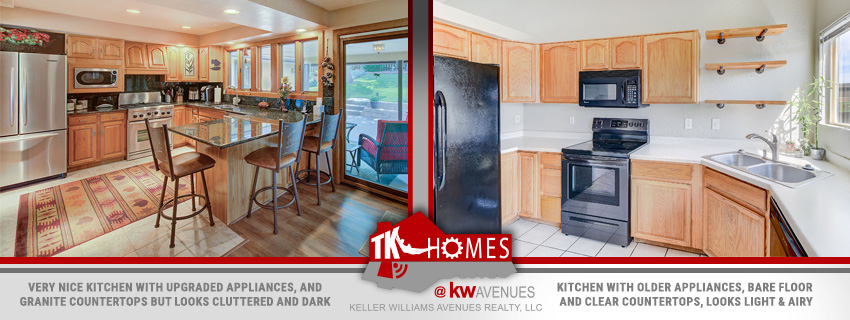
Despite having a beautifully decorated home, the truth is, having the least amount of stuff will allow the home to show its best. Many homeowners spend years curating knickknacks, decorations, and accessories. Even when the home is very clean and well kept, they will take up counter and wall space, create shadows, and make rooms look darker, smaller, and cluttered. Reducing these items will make photos much more appealing and give the viewers a sense of “what could be” vs. focusing on what they would change or reacting to the decor instead of looking closely at the home itself.
Preparing Your Home for Listing Photos Before Photo Day
1) Remove as many decorative pieces as possible and store items where possible » Items and decor can be placed in small closets, storage areas, or even in the garage. We rarely take photos of these spaces, the exception being notable customizations like RV storage, pull through garages, custom coated flooring, etc. As a side note, these items should remain in these spaces for showings. We’d much rather the interior and living spaces be clear and open and the storage and garage areas be full.
2) Make arrangements to remove pets » Many people are pet lovers, but many people are very sensitive to pets. Having them out of the photos will allow both parties to be happy-no need to distract people with cute pets.
3) Stow and store cleaning supplies, soaps, and toiletries » These are often left on counters, they are often bright colored, and can be very distracting in photos. They can make it look cluttered and can also have reflections in mirrors or shiny surfaces like counter tops, glass doors, and windows. This can detract from nice finishes as well as double the amount of clutter when reflected.
4) Remove towels, throw rugs, and blankets » Rooms look bigger, lighter, and cleaner when floors and furniture are bare and have nothing on them.
5) Steam clean carpets » This can make a big difference to how clean the entire room looks and can really help lighten high traffic areas.
6) Firearms and weapons » These should be stored and secured out of sight.
7) Working, matching light bulbs » “Soft white” light bulbs have a very warm and yellow light which can create a very calm and comforting feel but can also create strange color casts and reflections. This can be very noticeable, especially when combined with other temperature of bulbs (like “bright white” or “daylight”) or various interior patterns or colors. Make sure all light bulbs in each room are the same type of bulb and are not missing or burnt out. This will help make your home look brighter and cleaner.

Preparing Your Home for Property Listing Photos on Photo Day
- 1) Clean and tidy » Make sure all counter surfaces are as clear as possible and all furniture and floors are bare.
- 2) Open all blinds and shutters » Light is the name of the game. Photos almost always look darker than what we see in real life, so we try to let in as much light as possible.
- 3) Turn on all lights » For the same reason as in #2. Turn on all lights—under cabinet lights, stove light, porch lights, etc. Pro tip - If possible, you can put a small piece of electrical or masking tape on outdoor lights with sensors triggered by darkness.
- 4) Turn off ceiling fans » They end up looking blurry and sometimes cause weird shadows.
- 5) Park cars in garage or off property » We don’t want cars to block views of your home’s exterior. We also don’t want potential buyers to feel like there won’t be any street parking if they purchase the home.
- 6) Remove pets and supplies/accessories » It can be difficult to keep pets out of photos because of the wide-angle lens. Pet supplies can make backgrounds appear messy.
- 7) Remove any branded signage » If you have signs for your security system, lawn maintenance, or political signs please remove and store them because they are not allowed in the Multiple Listing Services (MLS). It is also recommended to store flags, sports team banners, and signs too.
- 8) Be ready to mobilize » Because of the wide lenses used for real estate photography, it is easy to accidently “photo bomb” an image from another room or even out on a patio or porch while the photographer is taking interior shots. It is good to be prepared to hang out on another floor or in other parts of the house depending on your home’s layout.
- This article should give you an idea of what to expect when getting photos of your home. If you follow these suggestions, it will help your photographer get the best photos of your home. Good luck selling your home! If you have questions about listing photos for your home, please don’t hesitate to contact us. We are always here to help
~ Written by TK homes’ in-house graphic designer & photographer Michael Butler


